
Tunneling X window applications
You need to run an X window application on a project machine in CSIM lab and display the result on your PC outside of CSIM: this is not allowed.
Instead, you can leverage puTTY and SSH tunnel to run X window applications across CSIM fireall.
The first step is to make sure that you have a working X window server (an X window display) running on your PC that you can use it to display X window applications running on your project machine; make the test while you are inside CSIM and there is not firewall issue. You must also test that TTY can be used to connect to bazooka.cs.ait.ac.th from outside CSIM.
On this page, Xming will be used as an example of X window server.
Configuring puTTY tunnel for X window
puTTY has a builtin facility to tunnel X window, but that facility is limited to the machine you connect to: in CSIM case, it is limited to bazooka.cs.ait.ac.th; it cannot be used for your project machine because you cannot SSH directly to that machine.
You have to design the tunnel by hand.
X window uses the port 6000 and followings. As several users can be using a tunnel on bazooka.cs.ait.ac.th at the same time, you may have port number conflict, in that case choose a port number greated than 6000, for example 6020, 6009, etc.
To the port 6000, corresponds the display 0; to he port 6001, to the display 1; etc. The display number is the port number minus 6000. If your X Window server is receiving connections on port 6010, you will run your X Window application with the option -display machine_name:10.0 Alternatively, you can set an environment variable with the shell command setenv DISPLAY machine_name:10.0 or export DISPLAY=machine_name:10.0
| 1. | Launch Xming on your PC. Your PC is now ready to display X window application, it is receiving connections on port 6000. |
|
| 2. | Start puTTY. Enable compression: X window can be sending large amounts of data through the SSH tunnel, between your PC and your project machine; you better reduce the amount of data with ccompression. Compression is configurable under the option SSH. |
 |
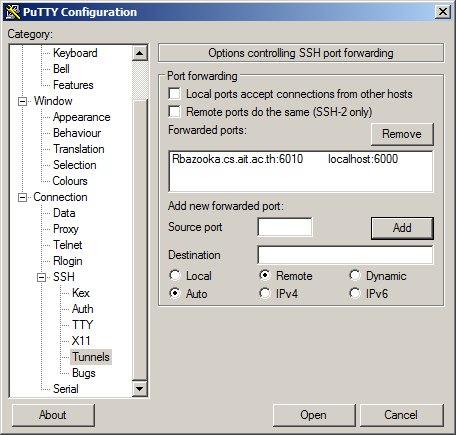
| 3. | Create the tunnel on TCP port 6000. On this example, I choose the port 6010 for bazooka. Go to the option SSH/Tunnels and add a new forwarded port from source port bazooka.cs.ait.ac.th:6010 to destination localhost:6000 Select the option remote. The option auto should be selected by default. Note that the source port maybe different from 6000, but the destination port is always 6000. Also note that the field to enter the source port is too short but you should enter the full bazooka.cs.ait.ac.th:6010 Click on add. |
 |
| 4. | You should have the forwarded port showing like in the image: Rbazooka.cs.ait.ac.th:6010 localhost:6000 |
 |
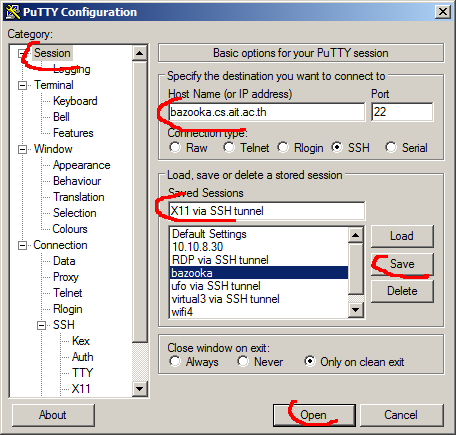
| 5. | Go to the session option at the very top and specify the destination where you connect to by entering bazooka.cs.ait.ac.th in the host name field. Give a name to the session and save it: you will be able to reuse it later on. You can then open the connection. Later you will be able to open the session you have saved and proceed on, starting from step 6 below. |
 |
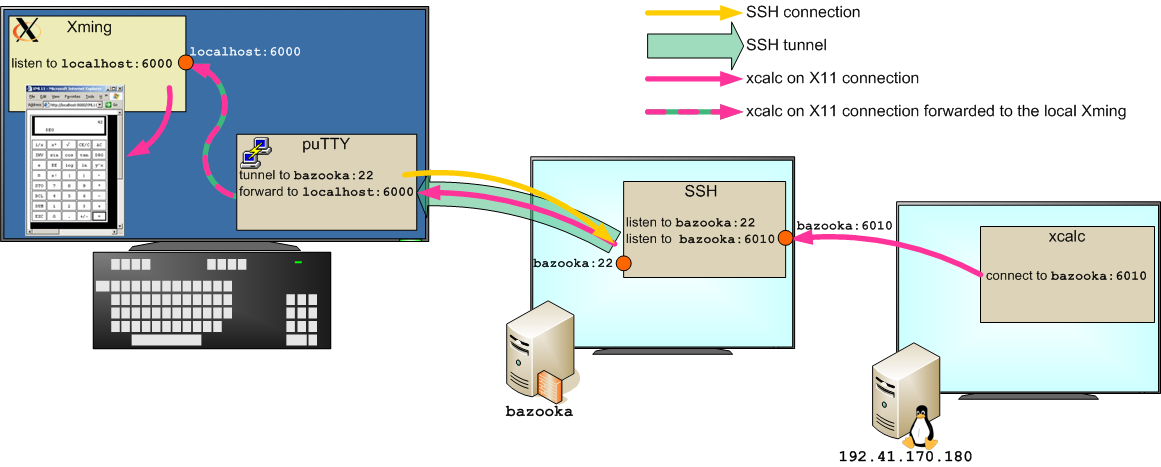
| 6. | Enter your CSIM username and password. You are connected to bazooka.cs.ait.ac.th and the SSH tunnel is created: bazooka at port 6010 appears like an X window server, but the display will be forwarded to your PC. Connect to your project machine, here 192.41.170.180. Run an X window application with the option -display bazooka.cs.ait.ac.th:10.0 The display number 10 in bazooka.cs.ait.ac.th:10.0 corresponds to the port 6010 on SSH tunnel to bazooka. |
 |
| 7. | Your X window application is running on your project machine and it is being displayed on your PC. | 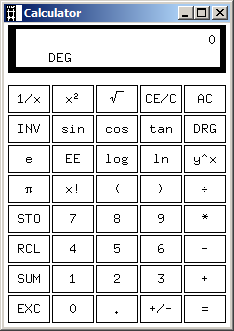 |
Et voilà!
| Powered by: | puTTY |

