This document gives an introduction to the Netscape World Wide Web browser running under Microsoft Windows 95.
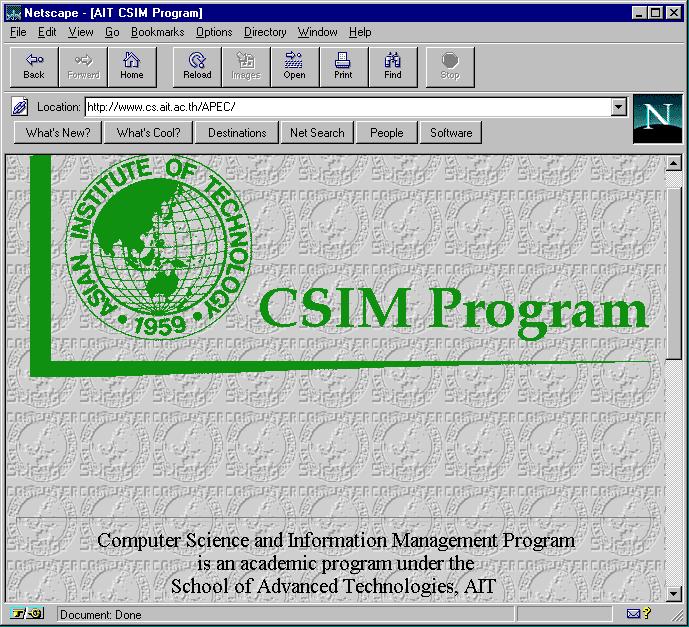
The Netscape screen display is illustrated below.
Notice the following areas:
Title area: The title area includes the name of the document.
Menu area: The menu area contains the menus you use to control Netscape.
Button area: The button area contains icons for widely-used options.
Directory buttons: The directory buttons can be used to access a number of popular services.
Text area: The text area is the main area of the window, in which WWW documents are displayed.
Status area: The status area contains status information, such as the destination of a hypertext link.
Netscape logo: The Netscape logo gives an indication of the progress of a file transfer.
You can access resources on the World Wide Web (WWW) by clicking on hypertext links. Hypertext links are displayed differently from the main text on the screen, often the links are underlined or displayed in a different colour.
To access a hypertext link move the mouse so that the cursor is positioned on a hypertext link. The link destination will be displayed in the status bar near the bottom of the window.
Move the cursor over a hypertext link and click the left mouse button once. The file located at the link destination will be retrieved and displayed in the text area of the Netscape window.
Go on with the following of the workshop click here.
Move to the File menu and select the Open Location option. A dialogue box will be displayed.
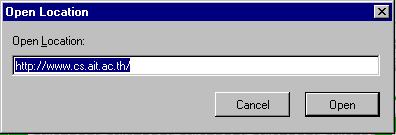
Enter a URL (Uniform Resource Locator) such as http://www.cs.ait.ac.th/ and press <Enter>. The file located at the specified URL will be retrieved.
Move to the Go menu and select the Backward option. The file you were viewing previously will be displayed. Move to the Go menu and select the Forward option.
Move to the Go menu and select the Home option. The home page will be displayed.
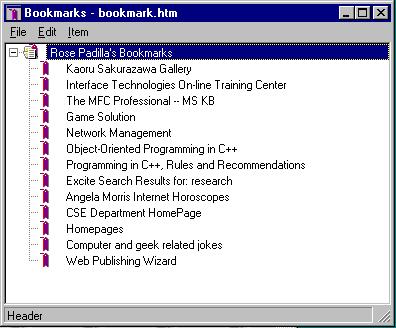
Bookmarks can be used to record the location of your favourite documents on WWW. To store a location in your bookmark file go to the page and then select the Bookmarks menu and choose the Add bookmark option.
To access a document stored in your bookmark file simply select the Bookmarks menu and choose the Go to bookmarks option.
Note that an optional Netscape add-on called Netscape SmartMarks provides greater flexibility and control over bookmark files.
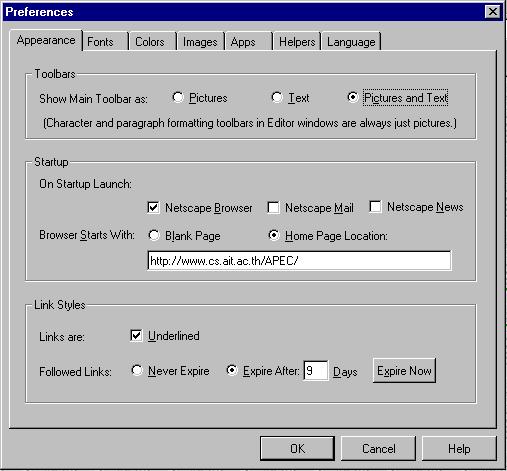 Select the Options
menu and choose the General
Preferences menu option. A dialogue
box will be displayed which can be used to specify Netscape configuration
options.
Select the Options
menu and choose the General
Preferences menu option. A dialogue
box will be displayed which can be used to specify Netscape configuration
options.
The following options are available:
Appearance: Display the toolbar as pictures, text or text and pictures. Specify the home page. Display hypertext links as underlined text. Specify the duration for visited links.
Fonts: Choose the font used to display text.
Colors: Choose the colour of the main text, hypertext links, visited links and the background.
Images: Choose the method used by Netscape to display images.
Apps: Choose the applications used by Netscape (usually only the Telnet application need be specified).
Helpers: Choose the helper applications used by Netscape
Language: Choose the language.
The name of the e-mail server often looks like organisation.ac.th or mail-gateway.organisation.ac.th
You must also specify the name of the POP e-mail server. This name is often the same as the name of the e-mail server above. You then have to specify the user name. In our case the name is in the form c9-number for example c9-8 (the name you should use is written in a label on the upper right corner of your screen).
You can then open the e-mail window from the Windows menu. You will be promted for the password of to use with your account. For our workshop, the password is apec in lower case.
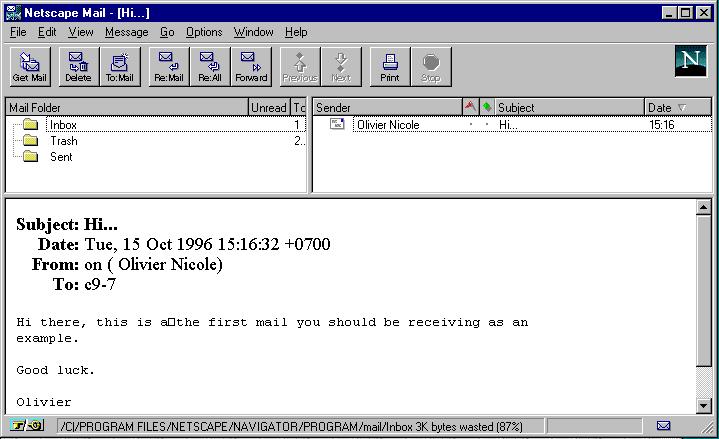
The windows is divided into three areas: in the upper left part the mail folders are shown, one for incoming messages, one for outgoing messages, other folders can be created to sort out the incoming mail.
Double clicking on a mail folder will open it. It's contents is then displaied in the upper right area. By double clicking on a message on the contents list, this message is displayed in the bottom area.
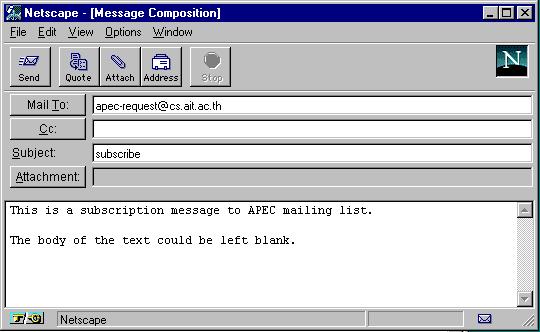
To register to that list, you must first send a message to the address apec-request@cs.ait.ac.th with a Subject line containing the word subscribe
After you subscribed, you will be able to send messages to the list.
You can also send messages to individuals.
Netscape can be used to access Usenet News.
The name of the Usenet News server must first be specified using the Mail and News Preferences option in the Options menu. The name of the News (NNTP) server is often news.organisation.ac.th or nntp.organisation.ac.th
Usenet News can then be accessed by selecting the Windows menu and choosing the Netscape News option.
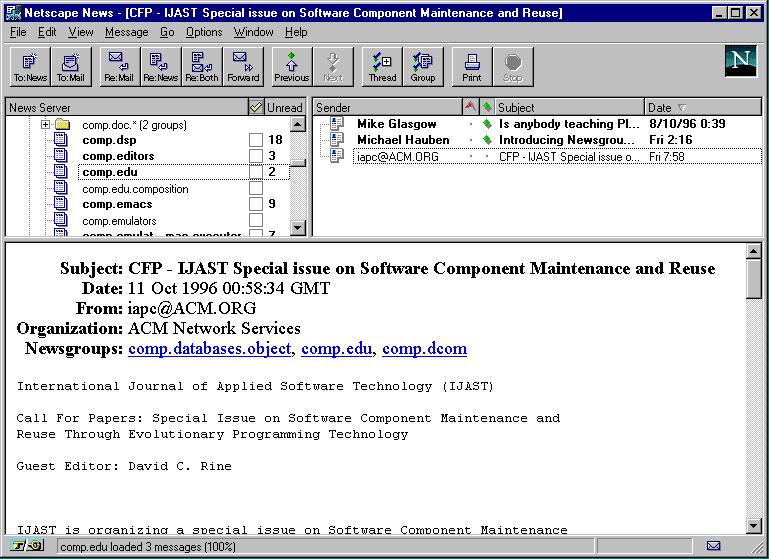
The accompanying diagram illustrates the display of Usenet groups, a list of articles in a group and an individual article.
Once you have selected a News server from the list, the available News groups will be displayed. To display all the available groups, select the Show all options from the Options menu.
You can also use netscape to access FTP servers.
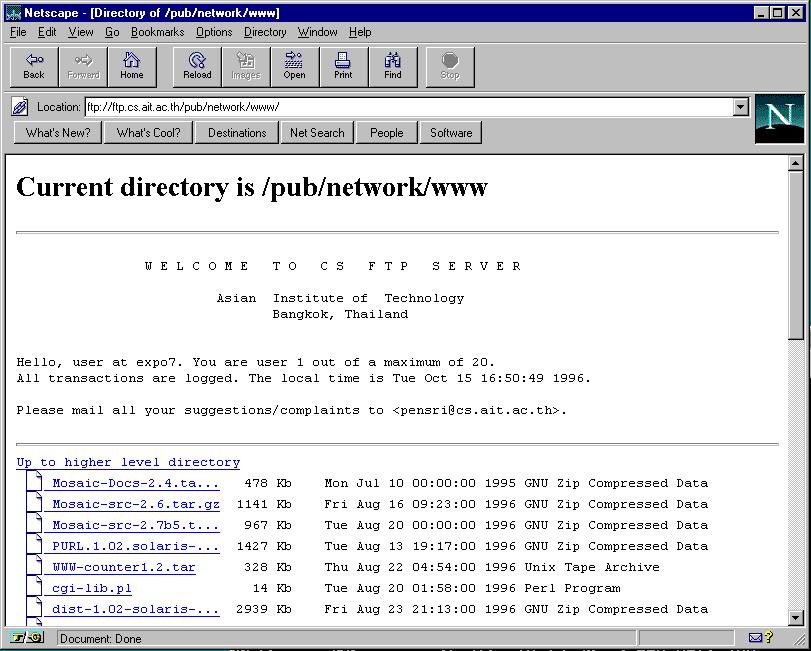
FTP server interface is primitive, you access the hierarchy of files and directories on the distant machine. You retreive a file by double clicking on it. You change directory by double click.
Try to access network resources located overseas during off-peak hours. For example, try to access resources from the US during the morning since this will be the night in the US. This will help to spread the network load.
Select the Options menu and switch off the Auto Load Images option. Inline images will be displayed as a text box, thus improving the network performance.
Click the right mouse button with the cursor positioned over a text image box. A set of options will be displayed. Select the Load This Image option to load the image.
Note that if a large image is being downloaded over a busy network you can press the Stop button to interrupt the transfer.
Select the Options menu and choose the Network Preferences option.
The Cache option allows you to specify an area of your hard disk and of memory to be used to store files you have previously retrieved.
The Connections option allows you to specify the number of simultaneous network connections (you should not change this from the default option).
The Proxies option allows you to specify the name of a proxy server. A proxy server provides a shared cache. Use of a proxy helps to improve the performance of the World Wide Web.
Select the Help menu. A list of menu options will be displayed. Choose the Frequently Asked Questions to access information on frequently asked questions.
Select the About Netscape option from the Help menu to discover which version of Netscape you are using.